Thursday, March 31, 2011

World Autism Awareness Day

This Saturday, April 2 is World Autism Awareness Day.  With 1 in 110 children being diagnosed with autism, it truly is an epidemic that needs special attention.  I work with many children diagnosed with autism and have worked with many in the past that have outgrown their diagnosis thanks to early therapeutic intervention.  I can't tell you the joy I feel when watching the smiles of a child and parent connecting for the first time playing peek-a-boo, seeing a child eager to engage with a sibling or hearing about a child making their first best friend. 

 Please take a moment to learn the signs of autism, so we can all better assist these children and make a difference in their lives and in the lives of their families. 

One of my favorite organizations, the Interdisciplinary Council on Developmental and Learning Disorders is honoring World Autism Awareness Day by making a number of lectures on autism by Dr. Stanley Greenspan available until 4/3/11.  Topics include:

  • Early signs of ASD
  • Older children and adults with ASD
  • Raising the ceiling
  • The CDC-ICDL report
  • The do's and don'ts of early intervention
  • Attention, OCD and anxiety in children with ASD
  • How infants and children learn,
  • The DIR/Floortime approach
  • Bioethical approach to aggression
  • What makes an intervention works and
  • Reforming education

Also, all ICDL publications will be discounted 10% for the month of April.  Discount code is AA2011.

I urge you to take a peek.
Thanks!

Thursday, March 17, 2011

Catch a leprechaun today!


Need some gold?  Tired of looking at the end of every rainbow only to find yourself disappointed that those pesky leprechauns fooled you again?!  Why not build a leprechaun trap?  It's a great way to fuel your child's imagination, as well as their fine motor, visual spatial and symbolic play skills.  

I received some inspiration yesterday from one of my favorite preschools that had their students come up with ideas from materials ready for recycling.  Children chose from cardboard boxes, glass jars, shredded paper, wrapping paper scraps and strawberry containers.  They were then told that leprechauns love shiny, sparkly things, so children eagerly decorated their traps with vigor.

Try to have your child visualize what a trap may look like.   What will lure the leprechaun inside?  Where will the leprechaun enter?  How will it get trapped?

Here is a simple trap made from a plastic container with a lid and a paper towel tube.  Nothing too fancy (it was done by a 3 year old).  I guess leprechauns love potatoes, so one was put inside so the little bearded creature could smell it via the "tunnel".  


An abstract idea that can be carried out for a day or two is excellent to keep children connected to a single idea and to work on delayed gratification.  Be sure to let your child know that leprechauns are very tricky and mischievous.  I say something along the lines of, "I have tried for years to catch one, and I never have.  We can try... but those leprechauns always find a way out."

I'm sure your child will come up with a ton of questions for you to creatively answer.

The leprechauns in my house come at night when everyone is sleeping.  They like to play with toys and then leave a mess to let you know how mischievous they can be.  Leprechauns also leave behind gold glitter wherever they walk.

Get as creative as you like... your kids will eat it up.

Here is a kid-friendly link for more leprechaun trap ideas.  I also like this link that provides ideas for geeky traps, if you really want to go all out. 

Saturday, February 19, 2011

Fun with food

Kids aren't the best eaters, which I am sure is no surprise.  Beyond bribing with treats, not much works to get little ones to eat the healthy stuff on their plate.  Sometimes even bribes don't work!

If you're at a loss at mealtime or are just looking for ways to make meals more fun, try making some food art.  Now, you don't need to be a food stylist to make this happen.  I just go with smiley faces most of the time.


Your kids may also enjoy making their own creations. 

This strategy is particularly helpful for children that are very picky eaters or have feeding challenges.  I once sat in awe and watched a speech pathologist work on getting children to explore different food textures by putting marshmallow fluff on the end of a pretzel rod and asking kids to go "fishing" by putting the sticky pretzel on some goldfish crackers.  Sounds disgusting, but those "picky" eaters ate up those fluff covered goldfish like it was manna from heaven.

Let your imaginations run wild!  I'd love to see some pictures, if you get creative.

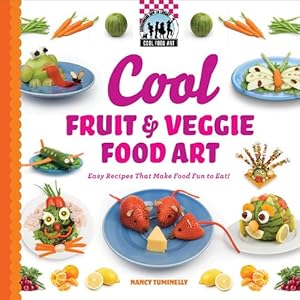
If you need some further inspiration, amazon.com has some good selections for "food art."  Here is one:
Cool Fruit & Veggie Food Art: Easy Recipes That Make Food Fun to Eat! (Cool Food Art)

Friday, February 11, 2011

You didn't know the Post Master General lives in your house?

Well, it's true!

It doesn't take much to make your little one a confident and competent Post Master General.  This is a great activity around Valentine's Day because chances are that your child will be mailing and/or receiving some packages and letters this month.

I always like to link play to real life experiences.  So, start with a trip to the post office.  This is a great opportunity to pre-teach the post office concept before you play it.  Before you go, help your child make some valentines, put them in envelopes to grandparents (g-parents love getting valentines, btw), address them and show your child how to affix a stamp.  Kids really enjoy stuffing envelopes, licking them shut and sticking on stamps.  Just be sure to explain that stamps are not stickers.  (I've made this mistake only once!)

You may also want to work on prediction skills and ask your child, "What do you think we'll see at the post office?"  Maybe even make a list and check off the items that you see once there.  My little guy responded "lions, dragons and sculptures."  He did get one checked off.

Once at the post office, take the time to look around and point important things out to your child like the scales to weigh the packages, the special forms, the postal workers, the items other patrons are mailing, etc.  It's also important to note the sequence of action since this will take place in your play -"First, we get our package ready to mail - then we pay for our postage - then the postal worker puts it in a bin for the mail carrier - then it gets delivered."
I'm not sure if I'm allowed to take photos inside a federal building, so don't tell on me.  I'm also not sure if I'm allowed to take one of everything at their preparation desks for us to play with later, but I did anyway. 

At home, set up a few stations, if you have the room.  A mail preparation area, a postal worker area complete with scale and cash register, a mail box with a slot (the slot makes all the difference for kids) and a delivery area.
Here is a preparation area.  Writing out the words that your child will use is a great early literacy tool.  Even if your child can't write his/her letters, having a model is a great start to show letter formation and just the idea of word usage.  I also like to use old stationary and envelopes to add to the mood, as well as stickers to use as stamps.  A hole puncher is also a good additon since it works on building fine motor muscles and helps kids make holes (they love that).


Let your postal worker weigh the package and tell the customer charges.  I also like to challenge the child to read the zip code off the package and type the same numbers into the cash register to work on number recognition.  Then, let the postal worker place the package in a mailbox for the mail carrier to pick up.  I like to use real messenger bags to increase the effect.


Finally, it's delivery time! 

My first blogging award... they give out awards???

Yay for play!  My first award for blogging, and I'm so pleasantly surprised!


I would like to thank No Monsters in my Bed for the award.  This super spectacular blog written by the lovely Darcy continues to inspire me with more ideas for play, art, reading and adventure.  If you live in the DC area, it's especially helpful providing lots of ideas to do in the nation's capital and surrounding areas.

To accept this award, I have to list 7 things about myself:
1.  I have learned how to tame my naturally curly hair over the years and have just started accepting that it's never going away.
2.  I can't stand bananas and haven't eaten one since I was old enough to object.
3.  I have an aversion to playing with play-doh and convince myself through self-talk that it's okay to touch on an almost daily basis.
4.  I love classical music.
5.  I sometimes do ballet while listening to classical music when no one is watching.
6.  I sing some mean karaoke.
7.  My family gave up watching television for 365 days.  Day 365 is on March 4th.

I also have to award recently discovered bloggers.  Here goes:
Modern Parents Messy Kids
Rummage
Let's Explore
Made by Joel
Mini eco

Now, back to preparing for the next blog post!

Oh, and btw, I'm tweeting now!  Follow me on twitter.  My handle (impressed with the lingo?) is PassionforPlay.

Thursday, February 10, 2011

Want your kid to have the most unique valentines?

I've never been a fan of the boxed valentine with all the licensed characters.  I know that little kids love them, but when giving a little piece of your heart I think that something handmade is way cooler than Optimus Prime or Dora on a perferated sheet of flimsy card stock.
I had a feeling that my little guy would put up a big fight not getting to pick out valentines with his favorite character ("Won't you be mine?  Love, Iron Man." Now, that just doesn't sound right).  So, I searched and searched for a project that is boy-friendly and also Valentine's Day appropriate.  The Artful Parent helped me out once again.  What little boy doesn't love the idea of giving rocks to his friends??

This project really doesn't take much.  I went to Hobby Lobby (cheapest craft store ever, btw.  Too bad it's so far away from me) and took a gander at their fabrics.  Now, I do not sew and have never really shopped for fabric.  However, I quickly found some good Valentine's options and bought 1 foot of two patterns. 

I also bought a bag of river rocks here which are found in the silk flower section. 

To start, cut out some appropriate sized hearts out of the fabric.  If your child is old enough to use sharp scissors, by all means pass along the job to him/her!  To affix the hearts to the rocks, paint some mod podge over the top and let dry.  My little guy particularly like this part.

We completed this project at my in-laws house which reminded me how lovely it is share these activities with family.  When was the last time your child's grandma or grandpa sat down at the table to do an art activity?  If you bring up the idea, I'm sure you will have some takers.  We even had a little get together that night and my little man loved passing out his heart rocks.


Saturday, February 5, 2011

Get all goofy with Egg Carton Aliens


I always love when I can combine an art activity and a play activity - or, in other words, make something to play with.

These Egg Carton Aliens are super easy and will allow your child to really use some creativity to make toys that they will, hopefully, play with for a while.

All you need is an egg carton (use some scissors to cut out the individual cups), tempera paint, and some alien creation goodies (googly eyes, fuzzy craft balls, etc.). 

Start by letting your little one paint the egg carton cups.

Once dry, you are ready to decorate.  For kids that have some difficulty with the creative process (i.e. get frustrated when they have to come up with idea on their own), you may want to make a model for them first and then ask them to make the same alien as you.  Or, you could try taking turns, "I put on an eye.  You put on an eye." 


And then, well, voila!  You have some out of this world aliens. 


I'm sort of partial to these birds that were declared, "Alien pets."  We made the wings with the scraps from our Valentine Garland activity.


A certain little guy I know worked on this alien for 25 minutes.  Talk about alien intensity!


Now, your child will be chomping at the bit for these puppies - uh, aliens - to dry so that they can be played with.  Now, all we need is ship.  Shoe box anyone?

Hang up some love

More coffee filter action!  Your little one will adore decorating for Valentine's Day with this easy heart garland.  This is also a nice way to include children of all ages and abilities in one art project.  I find that when kids create together, they are even more proud of the finished product.

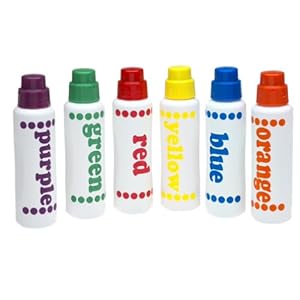
Start by getting some arty materials to decorate a coffee filter.  Once again, I love these dot markers.

But don't get shy to use glitter glue, markers, stamps, whatever tickles your fancy! 
Once you have a good number of filters decorated, cut out some hearts.  Just fold the filter into quarters and cut out the heart shape.  Be sure to leave some of the fold intact.  You will want to fold the heart over the string.
Next, lay out your string and hang your hearts.  You can glue the inside of the hearts to the string or for the lazy in the room (me!) just use some scotch tape.  I also dabbed a bit of glue stick on the inside so the back and front of the hearts stuck together.

And here's the finished product.  Pretty darn cute, if you ask me!


Wednesday, February 2, 2011

Valentines that will melt your.... crayon?

I found this idea on the Artful Parent blog - one of my faves.  This is a totally simple craft that kids of all ages will love. 

Start by letting your child choose 3 or 4 crayon colors.  Grate them with a cheese grater and keep the colors separate.  I used different graters to make the color shavings different sizes. 


Using some durable paper (I used water color paper), let your child sprinkle the shavings onto the paper.  This is a great time to help your child label the colors and discuss what colors are darker/lighter, what shavings are bigger/smaller, etc.

Once your little one is finished sprinkling, lay some wax paper on top.  Using an iron on the lowest setting, lightly iron over the crayon shavings allowing them to melt.  Your child will love watching this part!

Finally, encourage your child to use a heart stencil to make valentines.


Cut out and pass out to friends and family.  Xoxo...

Inexpensive craft kits are a no-brainer...literally!

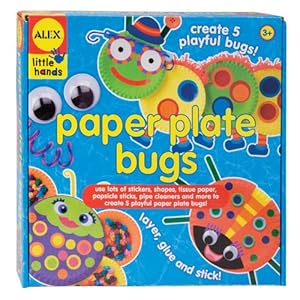
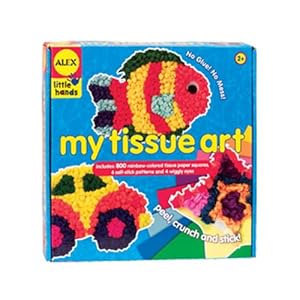
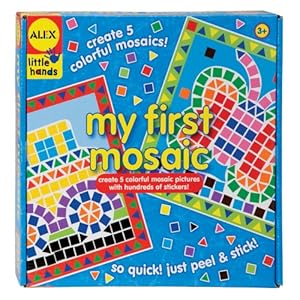
I love craft kits for days when I 'm not feeling especially creative. They are also great for when your little one wants to be crafty, but the idea of set-up and clean-up is just a bit too much that day. The Alex brand has some really lovely options that your kids will eat up. 

Big time cute factor.


I like this one because there is no glue needed.  Just peel off one section at a time to reveal a sticky surface, crumple the tissue and stick!

This mosaic set is incredibly easy for preschool age children and up.  Just peel the shapes and stick them on!


Here is a little guy I know making a T-Rex mosaic from this set.


Any other craft kits out there you'd like to share?


SNOW DAY!


We are officially snowed in here in Chicago with over 18" of snow.  Living in the city means that our streets won't get plowed for a few days and once you dig out your parking space, you don't want to leave for fear that you will lose it. 

So... we're here.  Inside.  For at least a day.  Or two. 


Which is great news for you (and me, too, I guess) because I can get caught up on the all the blog posts that have been marinating in my head waiting to get out to the blogosphere. 

On a snowy day, I can't think of a better activity than making coffee filter snowflakes.  You really don't need much:  Coffee filters, markers, water colors, safety scissors and whatever other decorating materials you can conjur up.  Personally, I love using dot markers for this activity.  They are fantastic tools for children of all fine motor abilities. 


Watercolors are great, too.

When it's time to cut shapes into the filter, just fold into quarters and cut cutting.  Younger artists may need you to draw shapes onto the filter to help them know where to cut.


Your child will love opening up his/her snowflake to see the design.

Be sure to hang them on a window for the full effect!


Tuesday, January 25, 2011

The Magic of Masking Tape

If you've ever seen me play, you know that at some point or another I will bring out masking tape.  When I travel to clients' homes, I often have masking tape with me - ready to help save the day. 

What, you may ask, am I doing with all this masking tape? 

Well, I'm using it to make roads on the ground.  This creates a wonderful visual for children to help them motor plan and sequence their ideas from one place to another.


I'm using it as a web to hold Spiderman from a skyscraper.


I'm using it to make casts on broken appendages.


I'm using it to tie closed the mouth of a ferocious beast and tie down the baddest of the bad guys.


Another great game is to wrap it around a child's feet with the sticky side out.  Then let them walk around with "sticky feet."  It's also fun to put some confetti on the ground and challenge your kids to pick it all up with their "sticky feet." 

Masking tape is also fantastic for utilitarian purposes in play - to help doors on cars that won't close, to hang up the written rules of a game or to tape on a name tag to help a child remember the role that they are playing.

Masking tape is just plain old awesome.  Your kids will come up with even more ideas, I'm sure!